

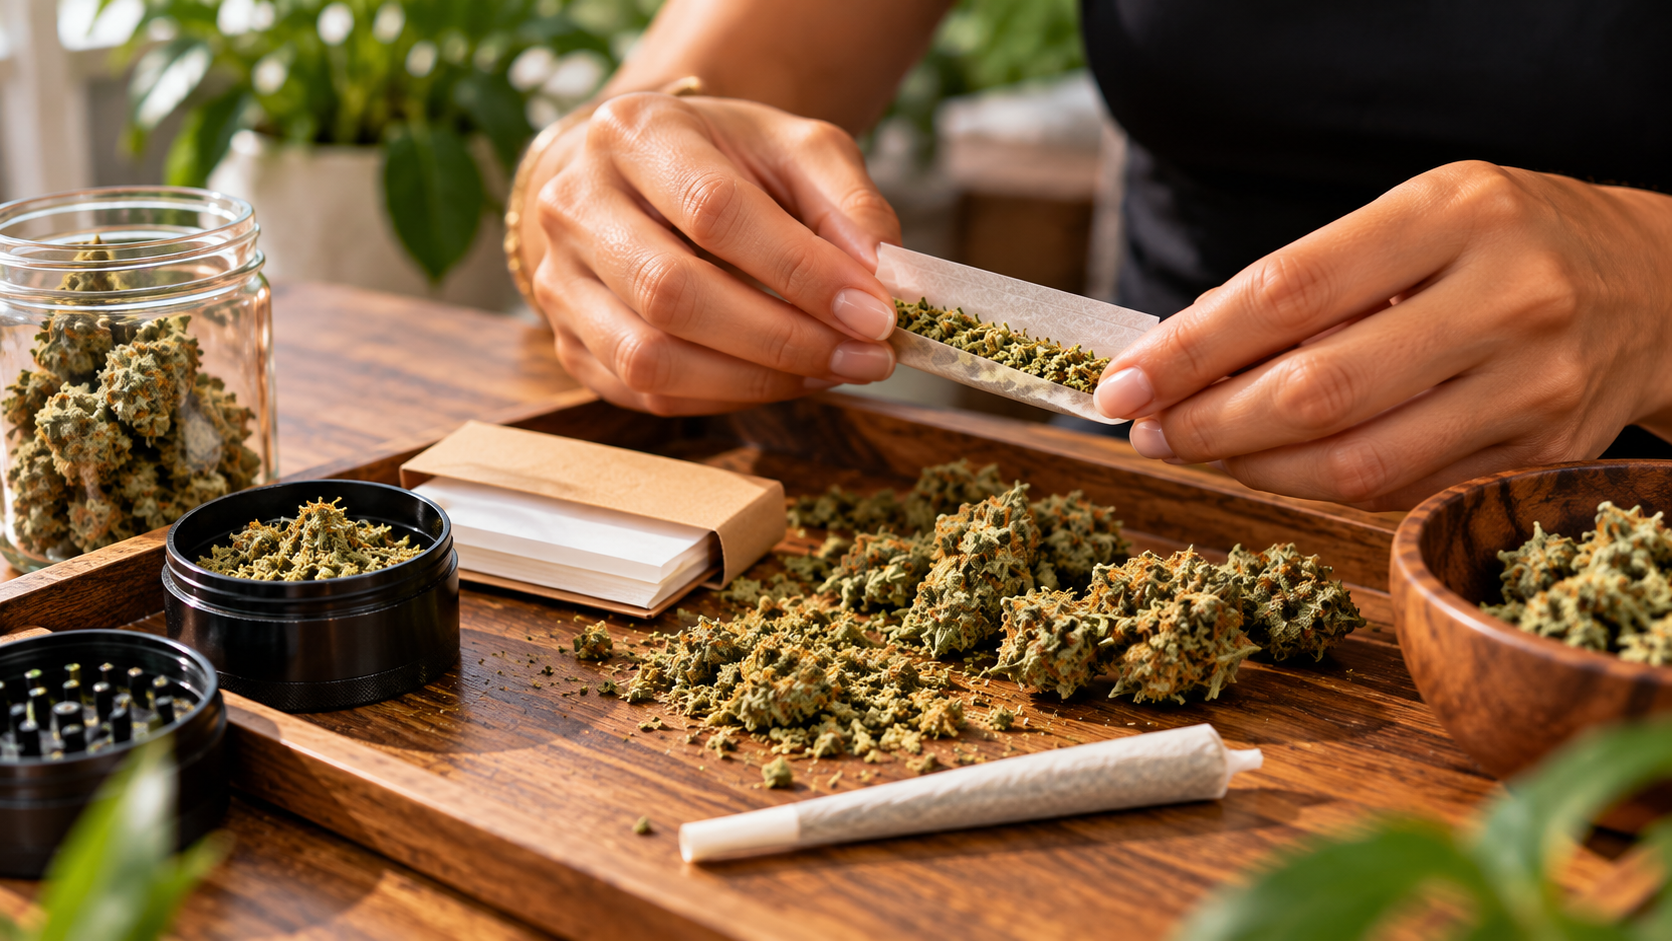
Beginner rolling guide · 8 clear steps · Updated 2026
Rolling a joint is mostly about even preparation and controlled paper handling—not speed. Learn the eight basic stages, see what to check at each one, and recognize the mistakes that make a paper wrap difficult to finish.
For adults where possession and use are lawful. This is an educational technique guide, not a statement that smoking is safe. New to ready-made products? Read our pre-roll buying guide.
Quick answer: how do you roll a joint?
Prepare the flower, form a paper tip, orient a rolling paper with its adhesive edge ready, and spread the filling in a fairly even line. Shape the paper into a loose cylinder, tuck the lower edge beneath the filling, then roll toward the adhesive and seal. Finally, inspect the unlit wrap for tears and gaps. The tricky part for most beginners is the lower-edge tuck.
Before you begin: Smoking cannabis or hemp is not risk-free. The CDC explains that smoked cannabis can damage lung tissue. Avoid exposing others to smoke, keep products away from children and pets, and never drive while impaired. Product laws and minimum ages vary.
What do you need to roll a joint?
A simple setup includes clean rolling papers, an optional paper tip or crutch, legally obtained flower, and a clean dry tray. A grinder helps create similarly sized pieces, but it is not compulsory. If you do not have one, see Mary Jane’s separate grinder-alternatives guide.
| Supply | Why it helps | What to check first |
|---|---|---|
| Rolling paper | Forms the outer wrapper. | Sheet is dry, undamaged, with an identifiable adhesive strip. |
| Paper tip / crutch | Gives the mouthpiece structure and helps contain loose material. | Clean, suitable, uncoated tip paper; it is not a protective smoke filter. |
| Flower | Provides the prepared plant material. | Correct product, proper labeling, condition and legal status. |
| Grinder, if used | Helps make pieces more uniform. | Clean equipment; avoid extremely fine powder. |
| Tray | Provides a clean preparation area. | Stable, dry, well lit, clear of clutter. |
How to roll a joint in eight easy-to-follow steps
Start by understanding the paper and tip, then work through the stages in order. Every step includes a quality checkpoint and a mistake to avoid, so you can recognize problems before moving on.
Prepare a clean workspace and the flower
Set a dry tray on a stable surface and break legally obtained flower into fairly even, small pieces. Remove tough stems that could pierce thin paper. A grinder can make the pieces consistent, but it is not essential. Avoid turning everything into fine dust.
Common mistake: Hard stems, powdery material and a damp tray.
Make a paper tip, also called a crutch
Use a purpose-made paper tip or a narrow strip of clean, uncoated card intended for this purpose. Make two or three short accordion folds at one end, then wrap the remaining strip around those folds to create a little cylinder. Keep its center open.
Common mistake: Using printed or coated scraps, or treating a crutch as a smoke-safety filter.
Orient the paper before filling
Hold a sheet lengthwise so the fold forms a gentle trough. Find the narrow adhesive strip near one long edge. Keep that strip near the top, positioned to meet the outer paper after the roll is formed. Rest the paper tip near one end of the trough.
Common mistake: Discovering the gum is on the wrong side only after the paper is full.
Distribute the flower in an even line
Place modest amounts of prepared flower along the paper trough, leaving room for the lower edge to fold over. Spread it across the intended length rather than building a large mound in the center. Beginners generally find an underfilled paper easier to handle than an overfilled one.
Common mistake: Packing so much into the paper that the edges cannot meet.
Shape the filling gently
Support the two long paper edges between thumbs and forefingers. Move them softly against one another to round the filling into a fairly even cylinder. Keep the crutch aligned. This stage is about arranging the filling, not squeezing it into a rigid tube.
Common mistake: Pinching hard, shifting the tip or crushing one section more than another.
Tuck the lower paper edge
Gently bring the lower, non-adhesive edge underneath the shaped filling. Many beginners find it easier to begin close to the crutch, which gives that end some structure. Work along the paper in small movements. If the edge wrinkles badly, loosen it and try again rather than forcing the fold.
Common mistake: Trying to seal before completing the tuck, or pushing through a tear.
Roll to the gum and close the seam
Continue turning the paper around the formed cylinder until the adhesive strip touches the outside layer. Dampen the gum minimally, then press it down gently from the crutch end toward the other end. Keep moisture away from the rest of the paper.
Common mistake: Oversoaking the adhesive or pulling a softened sheet hard enough to rip it.
Check the shape and secure the open end
Examine the unlit roll for tears, gaps, a loose crutch or obvious bulges. Make any small adjustments at the open end and fold or twist excess paper to keep the contents from falling out. If the wrap has torn, replace the damaged paper instead of covering up the hole.
Common mistake: Assuming an extremely tight roll is always better, or ignoring a damaged seam.
For a separate explanation of what causes uneven burning after assembly, see why a joint canoes or burns unevenly. This guide focuses on making the paper wrap in the first place.
What should a finished, unlit roll look like?
You do not need a perfectly symmetrical shape. A sensible inspection is about visible construction issues: a continuous seam, an intact wrap, a tip that stays in position and no obviously displaced filling. This check cannot establish how safe or potent the product is.
Signs the paper is assembled neatly
- The paper is intact without visible punctures.
- The seam stays joined along the wrapped section.
- The paper tip does not fall out.
- The overall shape is fairly consistent.
Reasons to replace or rework the paper
- A torn sheet or a seam lifting along its length.
- Very wet, badly wrinkled paper.
- A crutch that slides out easily.
- A major center bulge or collapsed section.
Beginner practice tip: Rehearse the paper-and-tip fold with an empty sheet first. That isolates the most delicate hand movement without the distraction of a full paper.
Seven common rolling problems—and what to check
If your wrap looks wrong, identify the cause before repeating the same movement. Many failures come from damaged paper, a shifting tip, uneven filling or an adhesive edge that never makes full contact.
| What went wrong | Likely cause | What to change |
|---|---|---|
| Paper rips | Sharp stem, damaged sheet or too much pressure. | Remove sharp material and start with an intact sheet. |
| Middle bulges | Material concentrated in the center. | Redistribute it before completing the seam. |
| Tip keeps slipping | Tip and paper became misaligned. | Reset the tip before making the tuck. |
| Paper does not seal | Adhesive on wrong side or inadequate contact. | Check gum orientation and use minimal moisture. |
| Paper becomes wrinkled | Too much moisture or repeated pulling. | Replace a badly dampened or weakened sheet. |
| Shape comes out crooked | Uneven filling or one side shifting during shaping. | Rebalance the distribution and support the tip. |
| One part becomes compressed | Excessively forceful shaping. | Use small movements and less pressure. |
Important distinction: A joint that is already assembled but burns on one side needs a different diagnosis. See our joint canoeing troubleshooting guide for that issue.
Flat papers, empty cones or ready-made pre-rolls: which is easier?
Not everyone wants to learn the paper tuck. There are legitimate differences between formats: a flat sheet requires shaping, an empty cone arrives pre-formed, and a ready-made pre-roll comes assembled. None is inherently a guarantee of safety, consistency or a particular effect.
Flat rolling paper
You form the wrap and choose how the material is distributed. The delicate tuck takes practice.
Best suited to: readers who want to learn the hand-rolling process.
Pre-formed empty cone
The conical paper and seam are already prepared. Filling evenly remains important, but the edge-tuck step is removed.
Best suited to: those who struggle mainly with tucking paper.
Ready-made pre-roll
The paper and contents arrive assembled. Ingredients, cannabinoid content and testing information should be judged from the product label, not appearance.
Best suited to: shoppers who prefer convenience and can verify the product.
Which paper types and sizes should beginners compare?
Paper thickness, texture, dimensions and adhesive can change how a sheet feels in the hands. For many people, a standard 1¼-size sheet is a manageable starting point, but there is no universal “easiest” material. Actual brands vary considerably.
| Type or size | What varies | What not to assume |
|---|---|---|
| Hemp-based paper | Texture and thickness differ across manufacturers. | That all hemp papers handle or burn identically. |
| Rice-based paper | Some products use especially thin sheets. | That less-visible paper makes inhalation safe. |
| Wood-pulp paper | Different finishes and thicknesses are available. | That all sheets have the same adhesive and handling. |
| 1¼-size paper | Shorter working length than many king-size sheets. | That size alone determines strength or effect. |
| King-size paper | Longer length and more material to manage. | That a larger sheet is always easier to handle. |
A practical paper-buying checklist
- Check the labeled size and material instead of relying on the packaging color.
- Inspect whether sheets are dry, undamaged and easy to separate.
- Look for clearly identified ingredients and manufacturer information.
- Decide whether a flat paper or an empty cone suits the amount of assembly you want to do.
- Avoid assuming that a paper, crutch or cone eliminates smoke-related health risks.
For the wider distinction between conventional, infused, CBD and other prepared formats, read What Is a Pre-Roll?. For jars, grinders and basic equipment, see Cannabis Accessories for Beginners.
Choosing flower and rolling accessories in Miami
Mary Jane’s Bakery Co. serves customers in Miami and has a current online CBD hemp flower category as well as a listed CBD pre-roll product. Online listings are not guarantees of in-store inventory, and the site does not currently provide a clearly verified rolling-papers or grinders catalog.
Before choosing flower
- Read the full product label and exact cannabinoid information.
- Check any available batch-specific certificate of analysis.
- Confirm that the product and intended use are lawful in your location.
- Consider storage instructions and warnings.
Before visiting for accessories
- Ask whether the paper sizes, tips or cones you need are in stock.
- Confirm store hours and pickup details directly.
- Compare product condition and clear packaging information.
- Do not rely on an old menu as evidence of today’s inventory.
Hemp flower, hemp extracts and medical cannabis do not become legally interchangeable because they look similar. Florida’s state hemp law, section 581.217, sets product-specific requirements, including restrictions affecting some ingestible or inhalable hemp-extract products. Always confirm the rules for the particular product rather than assuming every type is sold or possessed under the same conditions.
Explore Mary Jane’s Miami store and hemp-flower options
Compare the current listings and contact the store to confirm rolling-supply availability. This educational guide does not claim that particular accessories are stocked today.
Frequently asked questions about rolling joints
Can I roll a joint without a paper filter or crutch?
Yes. A crutch is optional, but it often helps keep the mouthpiece structured and loose plant material contained. It is not a certified health-protective smoke filter.
Is an empty cone easier than a flat rolling paper?
It may be easier for someone who struggles with the edge tuck, because that part has already been formed. You still need to handle the contents and read product instructions.
How do I stop rolling paper from tearing?
Work with an intact dry sheet, remove hard stems, use less pressure, and stop rather than pulling hard when the paper becomes damp or caught under the filling. Replace a torn sheet.
Why does my joint look uneven even after sealing?
Uneven distribution and pressure during shaping are common explanations. Check whether one side has more material or the paper tip shifted before the seam was completed. Appearance alone does not establish product potency.
Is a grinder required for a beginner?
No. It is simply one way to make the material more uniform. See Mary Jane’s separate grinder-alternative guide for that specific question.
Are hemp papers or paper crutches safer to smoke?
Do not assume so. Smoke exposure carries health risks regardless of rolling paper type, and a paper crutch does not reliably remove harmful smoke chemicals. See the CDC sources below.
Sources, editorial scope and further reading
This article describes visible paper-preparation techniques and points readers to the separate legal and health information needed to interpret them responsibly. It does not present unpublished staff tests as evidence, make medical claims, or guarantee a specific result.
- CDC — Cannabis and Lung Health: risk information about inhaled cannabis smoke.
- CDC — Cannabis and Secondhand Smoke: potential harms from smoke exposure to other people.
- Florida Senate — 2026 Statutes, §581.217: Florida's state hemp law and product requirements.
Updated October 2026. Educational information for adults, not medical or legal advice. Check local laws and verify current product labels before making a purchase.